Showing posts with label Classroom Crafts. Show all posts

Monday, May 22, 2023

End of School Year Projects (A Wrap-up)


Desktop Pencil Holder

Wooden Lockbox

Toilet Paper Binoculars

Milk Jug Pirate Ship

Wooden Sailboat

All of these projects are from Kiwi Co and have been a great addition to our homeschool classroom. The simple to build projects are suitable for anyone and each box can be personalized for your child's age range. The boxes come with full-color instructions, fun activities in each booklet, and educational material to learn about each project. It's a great tool to add to your homeschooling curriculum, or just a fun weekend project to do together. You can sign up for the Kiwi Crate that best suits you below.
1. Panda Crate (ages 0-24 months)
2. Koala Crate (ages 2-4)
3. Kiwi Crate (ages 5-8)
4. Atlas Crate (ages 6-11)
5. Yummy Crate (ages 6-14)
6. Doodle Crate (ages 9-16)
7. Tinker Crate (ages 9-14)
8. Maker Crate (ages 14-100)
9. Eureka Crate (12-100)

Wednesday, November 3, 2021

Homemade Fingerprint Powder

Have you ever wanted to be a forensic specialist and investigate a crime? As unfortunately as the world is, we can't get away from crime and heinous actions of others. With these crimes, forensic and crime scene investigators go to these crime scenes with a tool to find out if the criminal left any fingerprints that could link them back to their evil deeds. This tool is fingerprint powder. Although, the process to create fingerprint powder at home is a bit different than what is actually used, it still serves the same purpose in identifying fingerprints on objects. We recreated our own fingerprint powder and experimented on glasses to lift fingerprints off the surface. This simple fingerprint powder can be recreated at your own home and you can play around to see what surfaces you can lift fingerprints from and identify whose print is whose. Be careful, though, this powder will stain surfaces. Glass is a preferred surface.

  • Materials Needed:
  • 1. Cornstarch
  • 2. Measuring Cup
  • 3. Candle
  • 4. Porcelain dish or metal spoon
  • 5. Knife
  • 6. Small bowl
  • 7. Small paint brush
  • 8. Small funnel
  • 9. Small jar with lid
  • 10. Patience
Start by using a candle, bowl, and a metal spoon. Place the candle in the bowl and light. Using the flame of the candle (in a very well ventilated area, preferable outside), place the spoon over the flame and allow it to burn the back of the spoon. After a short time we will create soot on the back of the spoon. Scrap the soot off each time it's created. We will need about a tablespoon to 1/4 a cup of soot, so this takes some time. We did our collection over a period of several days. 


Depending on how much soot you have created you need to mix the same amount of corn starch with the soot powder. So, say you have a tablespoon of soot, mix that soot with a tablespoon of corn starch. 

Next, have friends or family to touch their forehead and then touch a glass surface. We used drinking glasses here, but you can also touch countertops, sliding glass doors, windows, and even plastic bottles, or soda cans. Just remember, whatever you use for your surface, make sure it's easy to clean up afterwards.

Once they place their fingers on the surface you can see the fingerprints, but only faintly. 


Next step is to use your newly created fingerprint powder and using a soft paint brush, lightly brush the powder over the fingerprint. Be careful not to press too hard, or you will disturb the oils in the print. Once you lightly lay a layer over the print, tap the glass to remove the excess powder.


Next step is to use clear packing tape, of course any clear, wide tape would work, we just happened to have clear packing tape on hand. You want to use the tape and place it directly over your fingerprints. Be careful not to press down too hard as you could damage the print, but a light rubbing over the top of each one is going to help with the lifting process of the print with the fingerprint powder.


Next step is to lift the prints and place them onto white paper. We used small post-it notes to adhere our prints, but computer paper would work, too. Place your tape down on the paper and press lightly. Here you can view your prints without worrying about messing them up any further. If you did several people's prints, it's interesting to see the difference in each person's print. Make note of how different they are, and if these prints were to be gathered for criminal reasons, how would each person be able to be caught, or eliminated? 


Be sure to save the rest of your fingerprint powder to use again in the future. We stored ours in a small corked glass jar along with the funnel and the soft paint brush. You can store yours in anything that seals and is able to be put away without spilling. Remember, this fingerprint powder has soot in it and will stain most surfaces. 


If you create this project we'd love to see it. Tag #rainvalleyredsnails on Instagram or Twitter, so we can see your fingerprint creations.

Tuesday, August 31, 2021

Watercolor and Salt Art


A simple art project to do with any age group. Even though Skylar is in the eleventh grade this year, we don't exclude art and downtime from studies. This art project is a lot of fun and only takes four simple items: 
•Liquid glue
•Salt/sugar
•Paper
•Water Colors

Start first with card stock, or paper. Cardstock is better for holding up with the weight of the glue and the salt or sugar.
Draw a design in glue on the page and be as creative, or as detailed as you want. Let kids use their imagination in the best way they know how. Any drawing in glue will do, but be sure to leave enough space between the lines of your drawing. Larger images work better like the ones above, or a house, the sun, or even basic shapes and designs.

Once the glue is drawn sprinkle on your salt or sugar. Either one works for this project, but be sure to cover the entire area that's been glued. Allow the glue to dry with the sugar or salt on top. 24 hours should be enough time to dry completely.

Once dry, use the watercolors in different colors to drip a small drop onto the grains of the salt/sugar. It only takes a bit, so go slow and make sure you use a small drop at first and work your way up to more as you see the colors change and travel down the salt/sugar. 

Once finished, allow to dry 24 hours and hang up your masterpiece. 

Cardstock we like here.
Watercolors we like here.
Salt we like here.
Liquid Glue we like here.

Saturday, July 31, 2021

Solar Hot Dog/Marshmallow Cooker

We've been experimenting with solar energy lately and learning how it can be beneficial for many things. The temperatures this summer have been incredibly high, with one day being over 119 degrees. We've been using these hot days and full sun to cook some food via solar cooker. Solar panels are nothing new, but solar energy can be harnessed into cooking, as well. The last few months we did a few experiments and tried out different things to cook with solar power. We constructed this solar cooker and began "cooking" different types of foods.


The hot dogs were veggie dogs and they took about four hours to heat up enough to consider them "cooked." 


The marshmallows are Dandies and they took about six hours to cook enough to be creamy on the inside. They were delicious after cooking in almost 120 degree sun most of the day. We will definitely be doing this experiment again.

You can make this same style of solar cooker, here's how:

2 sheets of cardboard (we used plywood instead of cardboard to make it sturdier) 7 1/2" x 30"
2 pieces of posts (we used garden stakes and cut them to length) 2" x 2" x 12"
1 sheets of poster board, or cardboard (we used cardboard) to line the bottom of the cooker
12" of aluminum foil
2 pieces of wood to hold cooking skewer (we used garden stakes and cut them to length) 1" x 1" x 13 1/2"
Wooden dowel, or bamboo rod (we used a marshmallow wood cooking skewer)
Small nails or screws

1. Use a knife and cut a curve in the carboard. If using plywood, cut to length shown above. We had Home Depot cut ours down and then shaped them better at home with our own saw. We sanded down the edges a bit, as not to get splinters or cuts. 

2. Place the connecter stakes between the two ends and secure with small screws. Now you should have what resembles a boat shape.

3. Place your small boat shape over the poster board or cardboard and mark your lines as you rock the shape up and down to mark the top and bottom. Cut out and place inside your cooker for the bottom.

Using a drill, drill out the top of your cooking boards that will hold the cooking rod/skewer. Place them on either side of the cooker and screw into place with the notches facing up.

Glue the aluminum foil to the bottom.

Place the food you're going to cook onto the skewer and place each side into the notches on your cooking boards.

Place cooker in direct and constant sunlight for several hours. Be sure to solar cook foods that if undercooked won't cause illness. 

The sun will cook your food because of the aluminum foil reflecting the heat back onto your foods. Because of the slight curve in the cooker, it concentrates the heat in one place, furthermore helping cook the item. We used a bug net over the top of our food to keep bugs and other insects off what we were cooking. 

Thursday, August 27, 2020

Marble Paper

We took paints and milk and created marble milk paper in the classroom this week. It was a lot of fun to see the designs that created with each sheet we ran through the milk/paint mixture. It's a simple process of one cup of milk and water colors, food coloring, or paint applied to the milk surface and a plain sheet of paper laid on top. We think the process would have been more uniform with acrylic paints/oil-based paints, but it was still a fun activity with what we used. We allowed the paper to dry in the sunshine.


Tuesday, December 10, 2013

Classroom update (November 25-December 6 )

Monday (November 25):  

We started our week off with the new schedule.  Of course with Thanksgiving later in the week, we took Thursday and Friday off, so on Monday we packed in as much as we could.  Who can't use a four day weekend?

We got a new list of spelling words for the month.  We are a bit delayed on the spelling list because of getting into a new routine, with what subjects we do, on what days now.  You can find our full schedule under the "Our Classroom Schedule" tab at the top of the page.

Notice our new board light?  We love it!
Our spelling words for the rest of November:

  1. body
  2. music
  3. color
  4. stand
  5. sun
  6. questions
  7. fish
  8. area
  9. mark
  10. dog
  11. bargain
  12. certain
  13. orphan
  14. fountain
  15. oxen
  16. latitude
  17. longitude
  18. compass
  19. absolute
  20. equator
  21. compensation
Trouble Words from October:
1.  height
2.  tongue
3.  straight

We also covered more on money counting and counting back change.  We did board work for this and will set up a mock grocery store next week to have some fun with it even more.

My diagram is of a grocery store purchase and how much change will come back from a purchase of a soda.  We went over how simple subtraction is all that's needed to give change back.  

Tuesday (November 26):

On Tuesday we covered a bit of history.  We talked about the history of Thanksgiving and why we celebrate in giving thanks.  I let Skylar write down 10 things he is thankful for and we talked about each one.

We also covered a bit more on our continent and animals from that continent in Social Studies.  Skylar has already completed three continents of the seven we are covering.  His animal of continent and animal of choice this time is the panda in Asia.

Wednesday (November 27):

On Wednesday, the day before Thanksgiving, we did some reading and did a Thanksgiving craft.  For our reading we started in on Book 2 of "A Series of Unfortunate Events."  We finished Book 1 a few weeks back and to celebrate we prepared a dish of Puttanesca Sauce


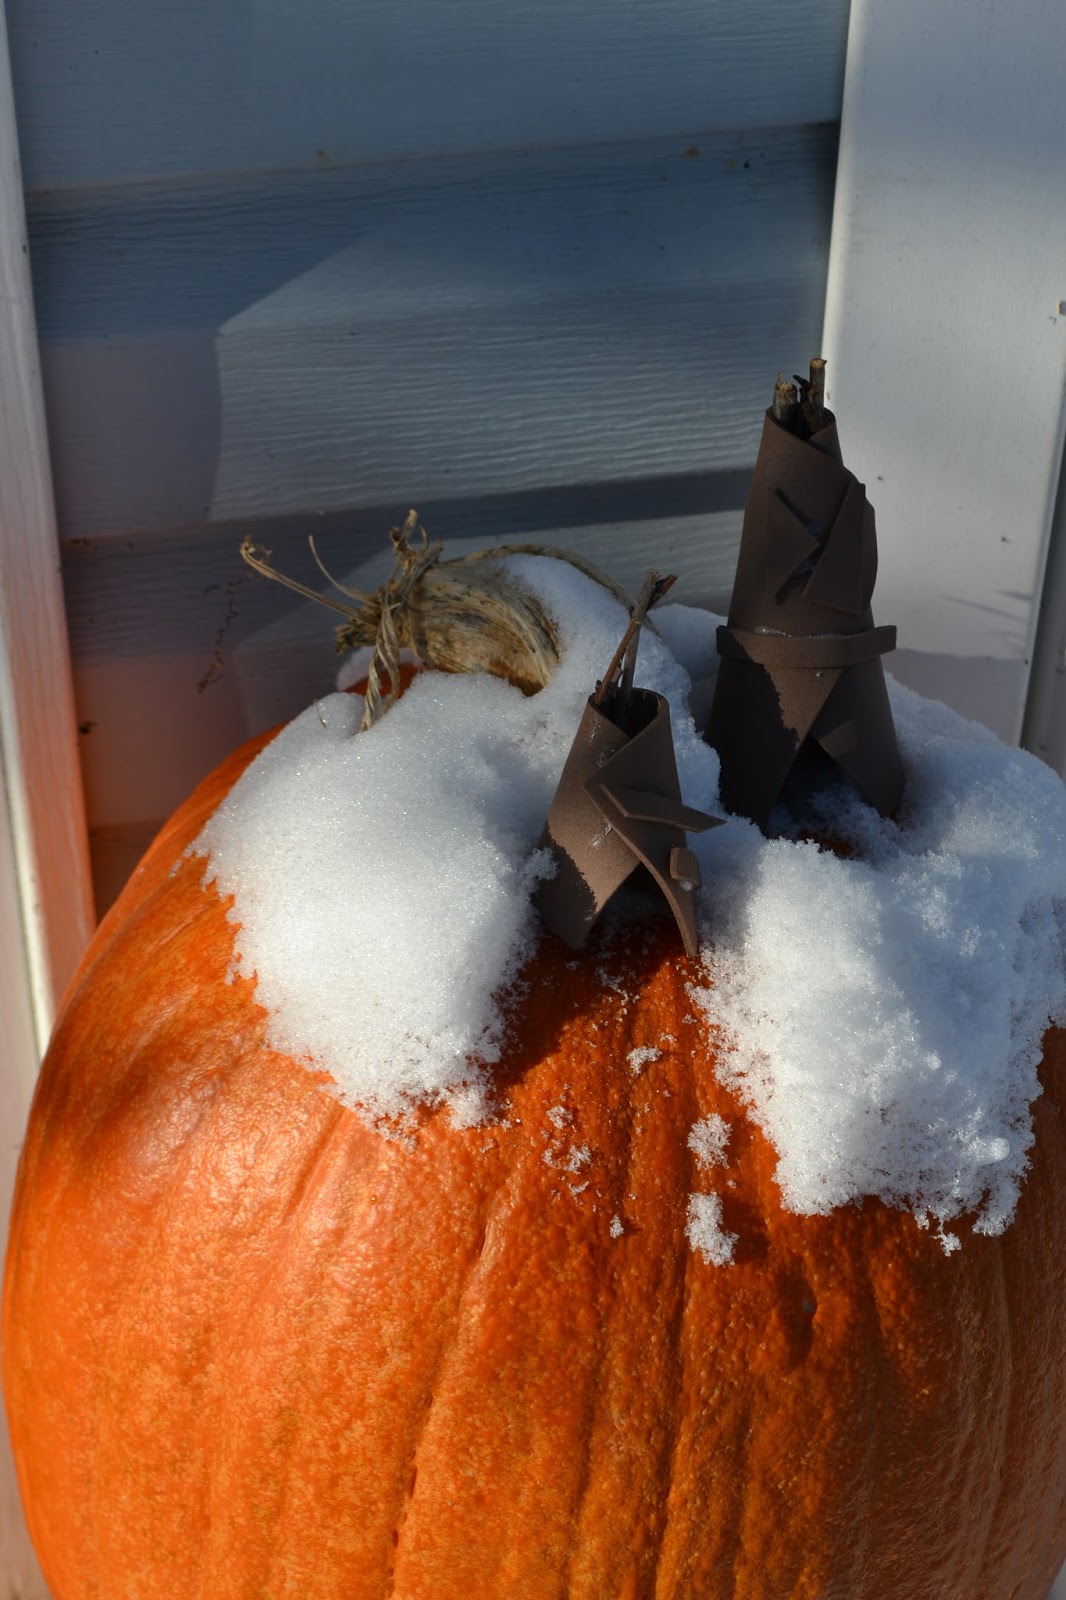
For the Thanksgiving craft, we made tee pees to add to our table for Thanksgiving dinner.We ended up using felt sheets instead of foam, and we love how cozy they look.  Skylar went on a hunt for the sticks to use, and we also added these Indian-themed additions to add to the table along with the tee pees.


Thursday (November 28):  Happy Thanksgiving (No class held)
Friday (November 29):  Thanksgiving Break (No class held)

Monday (December 2): 

On Monday, we got back to class with a little bit of math work.  We set up a mock grocery store and had Skylar be the checker that had to give back change to the rest of us.  We had grocery purchases that were made and change was worked into the learning.  We then talked about how hard, or easy the change was and what we could get better at.  Skylar did a fantastic job with this, and we all had a blast!


We also worked in a worksheet for Probability and Data.  We talked about graphs and how they can go from a pie chart to a graph depending on how we wanted to look at the data.


Tuesday (December 3):  

Science:  We talked a lot about the difference between rocks and minerals.  I sent Skylar on a scavenger hunt to find as many rocks and minerals as he could.


History:  We covered a few more things about Thanksgiving and touched a little on Native American Indians.  I let him draw and color his own version of how he saw the first Thanksgiving dinner with the pilgrims and the Indians.


Social Studies:  We worked more on our animal and continent books.  We are currently on pandas and Asia.

Wednesday:  (December 4):  

Spelling:  We took a mock spelling test to determine what words we need to work on.  I have started a new lesson with spelling words:  Writing them three times, then use them in a sentence that he thinks they work best in.  This seems to be a good teaching lesson on working on handwriting as well.

Reading:  We read another chapter in the "Series of Unfortunate Events" book 2 (The Reptile Room) and talked about what we had just read.  The story is getting very interesting.


Writing:  Skylar has been adding to his journal entries that we keep.  He has to draw a picture and then come up with a story line to go with the picture.


Thursday (December 5):

On Thursday, we reviewed everything we had talked about and covered in the days before since Monday.  We also studied over the spelling words to prepare for the test that will come later in the month.  From everything else we go over and learn, the spelling test will come on the last Friday of the month now.  

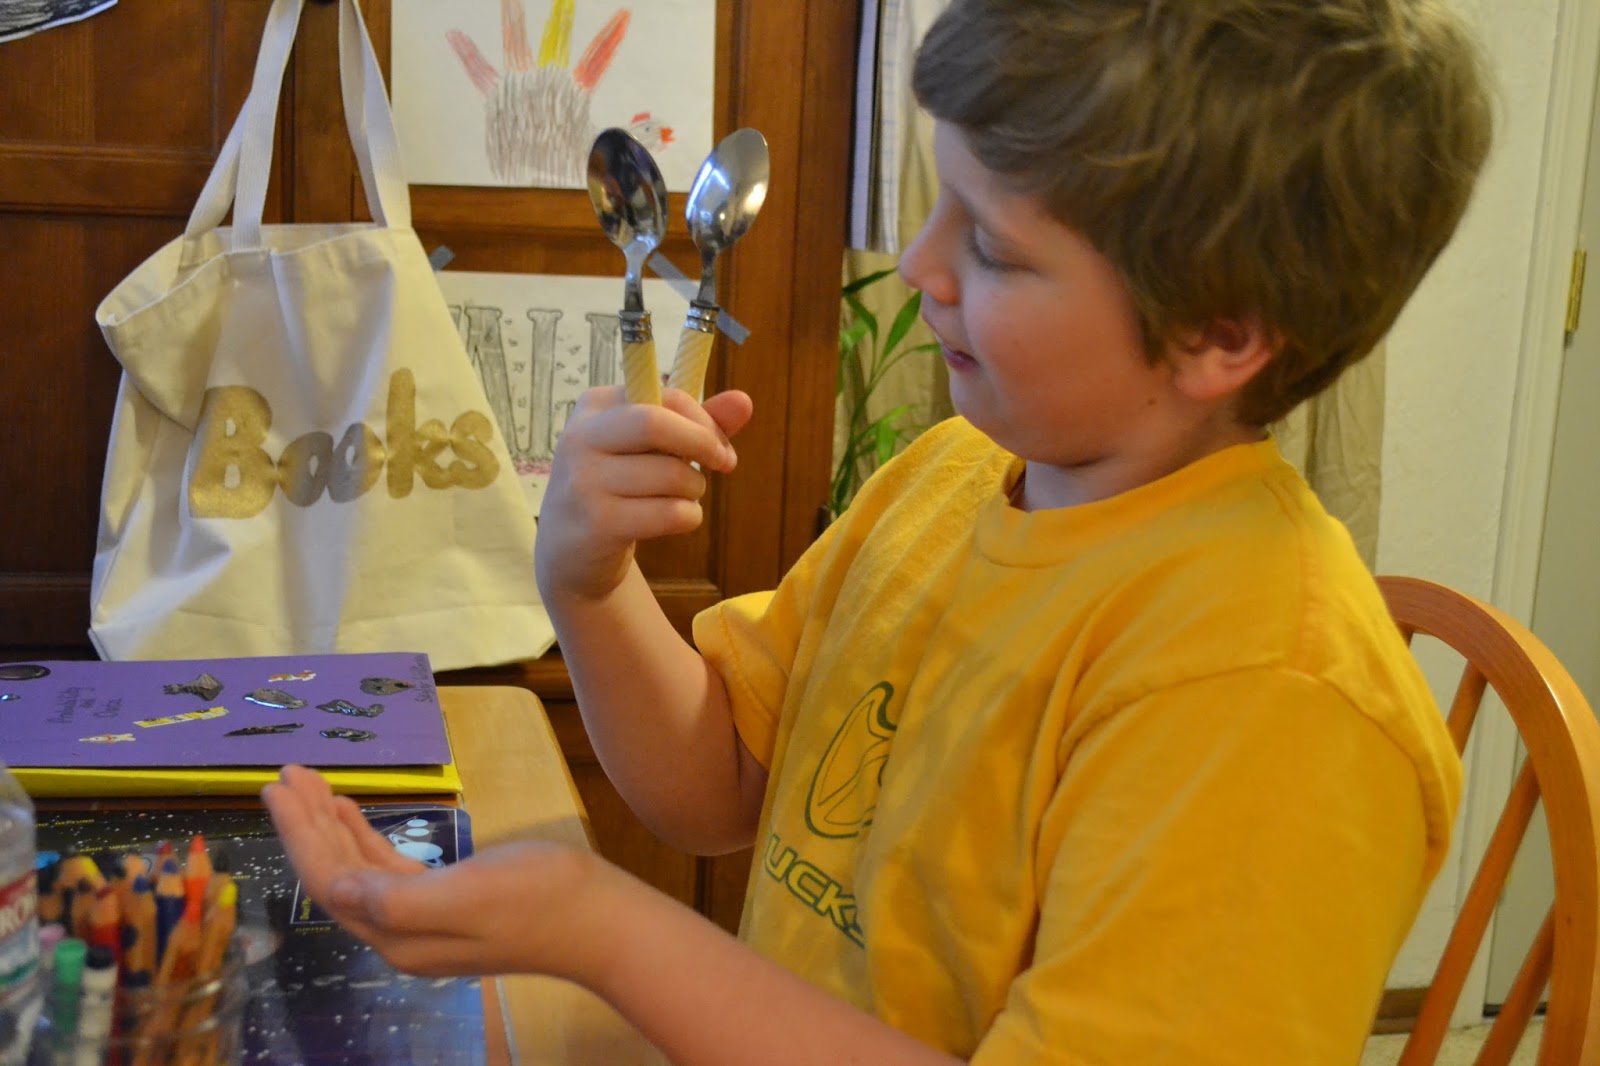
Music:  I've decided to add in a bit of music lessons into our weekly schedule.  On Thursday, we played with spoons and how to make music using spoons.  Skylar had a blast with this, and it will be something we do again, for sure.


P.E.:  Currently our P.E. time consists of indoor activities due to the rain, and the cold.  Hopefully there will be more to add to this once we get out of the cold spells here in the Willamette Valley area of Oregon.

Art:  For art this week we made snowflakes from coffee filters.  We are going to be working on these in the next few weeks and reveal our creations the last Thursday before Christmas, so stay tuned for that.


Cooking:  We have been working in some cooking learning with this homeschool time.  It's going very well, and it also gives us some great time to spend together in the kitchen too.  This week me made some cupcake brownies that were part of a Valentine's Day gift box that came in February.  


This little kit came with everything we needed to make these cupcakes, so it was a perfect tool to follow in a step-by-step cooking instruction.

First, we melted the butter.

Then, measured and added the water.

Then mixed the batter and added them to the prepared muffin tin.

We baked them up and they were perfect.  We then talked about the small things we had learned from the cooking lesson.  Skylar said that he learned how to read a measuring cup during that lesson, so that is a big plus.  

Friday (December 6):  

On Friday we took our end of the week test on everything we covered in the past four days.  I like to do an end of the week test to determine if we should move on from a lesson or not.  It's also a great way to gauge where we stand on what we are learning too. 

Hope you had a great Thanksgiving and look for a classroom update in two weeks.  

Copyright©